Blogging Tips and Tricks

Do you want to have your voice heard, or get your foot in the door of the fantasy sports writing industry? There’s no better place to start than the RotoGrinders blog program, for a few reasons:
1.) Zero experience is needed. As long as you write a quality blog that adheres to the RotoGrinders Blog Program Terms & Conditions (which you can find at the bottom of this page), your blog will be published and perused by RotoGrinders readers.
2.) It gives you access to a built-in readership. There’s nothing wrong with starting your own blog and slowly (maybe very slowly) building an audience on your own. But the blog program eliminates a lot of that legwork. How many other sites allow content created by its community to be posted right there on the front page right next to articles by industry greats like Notorious, Derek Carty, and STLCardinals84?
3.) You can get PAID to write. Thanks to our sponsorship with FanDuel, we’re able to award prizes at the end of each month for the top blogs, which are distributed straight into your FanDuel account. It’s pretty uncommon to be paid for a first writing gig, so the possibility of getting a little cash for your hard work is a big plus.
I didn’t know what to expect when I posted my first blog at RotoGrinders, but immediately, I started receiving positive feedback, which encouraged me to keep writing. It’s a good feeling knowing that your work is being read, and the blog program affords that opportunity.
But like a lot of things, the hardest part is getting started. In an effort to make blogging at RotoGrinders as easy as possible for new and established bloggers, I thought I’d throw together a few tips to help bloggers get started. So without further ado…
1. Get started.
This is the easy part. All you have to do is click the little guy in the upper right corner of the screen, click “Blog,” click “New,” and start writing. It’s really that simple. Don’t forget to give your blog an interesting title and provide a quick summary so readers know what to expect from your blog.
2. Be sure to meet the minimum word count.
No matter how good the writing is, all blogs must be a minimum of 600 words to be published. If Matthew Berry signed in and wrote a 560-word blog, it wouldn’t get posted. Actually…if you’re Matthew Berry and you’re reading this, maybe we can make an exception. Unless your name is Matthew Berry, shoot for 600 words or more.
3. Don’t forget to click “Mark for Review.”
Once you’ve written your blog, click the “Mark for Review” button at the top of the screen. When you click that button, the editing team receives an email saying that your blog is ready to be published. If you don’t click it, we don’t get the email, which means your blog is floating somewhere in the ether, alone, never to be read…just kidding; we can find it. But it’s a lot easier if you just click “Mark for Review.”
4. Experiment with different headings.
Make your blog visually appealing by using some of the heading options available. No matter what you’ve got to say, if someone opens a blog to see an entire page of single-spaced text without any breaks, it can be…a little scary. Not to mention, hard on the eyes. Break up sections with headings using the code below:
h2. will look like this.
h3. will look like this.
h4. will look like this.
h5. will look like this.
5. Experiment with formatting.
Bold text by enclosing a word/section in asterisks, like this:

Italicize text by enclosing in underscores.

Strikethrough text by enclosing it in hyphens.

Underline text by enclosing it in plus signs.

6. Add player images to your blog.
Unfortunately, these can’t just be any images. For the first blog I ever wrote, I just added a bunch of images I’d found from Google Images, posted them in my blog, and wondered why my blog was never published. Because of copyright laws, we’re only allowed to publish images that we’ve purchased the rights to. Luckily, we can purchase the rights to any relevant player you might want (I even requested an image of Diamondbacks-era Randy Johnson when I was blogging, and within a few hours, there he was, in all his six-foot-ten-inch, mustachioed glory).
So here’s how you do it: copy the URL below, and substitute in the player’s name that you want.
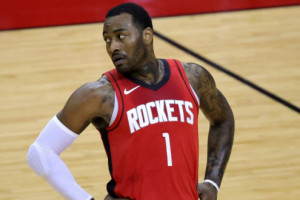
https://s3.amazonaws.com/rical-images/john-wall-300×200.jpg
Then, enclose it in exclamation points. If you miss this step, the URL above will remain a URL, and not an image. Once you add the exclamation points, like magic, this will happen:
One other thing: you can change the size of the player image. Player images at RotoGrinders come in five sizes:
800×480
550×330 (this is the size you want for your Summary Image)
300×200
100×75 (this is the size you want for your Thumbnail Image)
50×50
The John Wall image above is 300×200 (and that’s the size I typically use in the body of an article), but if you want it a bit bigger, go with 550×330 by simply substituting those numbers for 300×200 in the Wall image URL above. When you do, it’ll look like this:
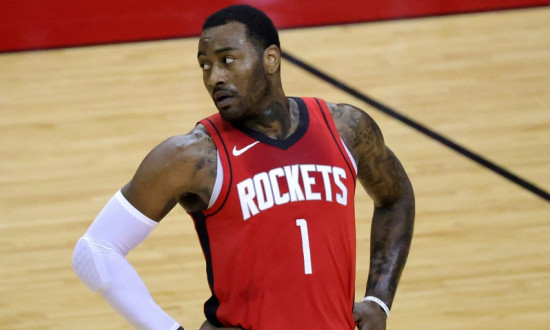
Or, if you’re writing a blog post for ants or really, really tiny people, go with 50×50:

7. Add custom images to your blog.
You’re not limited to player images; if you have a custom you’ve taken that you want included in your blog (for example, a screenshot of a lineup), you can do that, too. You’ll need to find a site to host your images (most people use Imgur or Flickr), then upload the image at the site, copy the image’s URL, and paste it between exclamation points.
So, for example, here’s my URL:
https://s3.amazonaws.com/rical-misc/ScreenShot2017-02-19at8.01.09AM.png
Once I enclose it in exclamation points, it changes the URL to this:
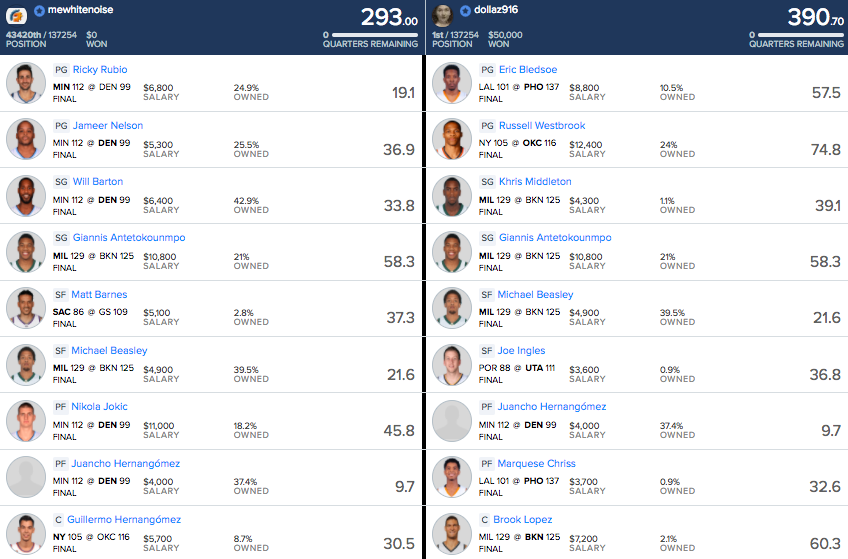
Wow – not my finest lineup (in my defense, it was my cash lineup, which I threw in a few GPPs because why not?). But getting a 60-burger from Brook Lopez, plus 36 and 39 points from Joe Ingles and Khris Middleton (both at around one percent ownership)…that’s how you win a tournament.
8. Add GIFs to your blog.
If you want to liven up your blog even more, add a GIF or two. Maybe you want to show a great play from player you’re writing up. Maybe you’ve written a line that’s just begging for a clip of The Office or Seinfeld. Maybe you just feel like showing a raccoon playing in a sprinkler:

Whatever your reason, it’s really simple to add GIFs to your blog posts. The easiest way is to go to giphy.com, and find a GIF that is appropriate (or, in the case of the raccoon, not appropriate at all but just funny), click on it, then click the “Advanced” tab. Below, you’ll see a text box labeled “GIF Download.” That’s the URL you want. Copy that, paste it, and enclose it in exclamation points (just like a regular image), and you’re good to go.
9. Move your images/GIFs around on the page.
You’ll have noticed that all of the image and GIF examples above have been justified left. That’s because I didn’t add any code saying I want my image/GIF centered or right justified. Left is the default setting, but if you want your image centered or right justified, use the following code:

Placing images/GIFs on the page can be a little tricky, and unfortunately, Textile doesn’t allow you a ton of freedom in where the images appear, nor does it make it easy to be super precise with image placement. But if you want a player image placed to the right of the player you’re writing about, place the URL above that write-up. For example, if I was writing up John Wall, I would do this:

!(align-rt)
Doing so will wrap the text about John Wall around the image of Wall, which gives it a cool, more professional look. By the way, you probably should play John Wall, but hopefully you’ll be able to find better reasons than “he’s a very good basketball player.”
10. Add blank spaces to your blog.
Readers need occasional spaces between lines to pause, catch their breath, and process what they’ve just read. Luckily, breaking up long chunks of text is really easy to do in Textile. Just go to a new line, and type this:

So, if I wanted the last sentence above to stand alone on its own line, I’d do this:

Let’s say you wanted to add three spaces between one paragraph and the next. You would think you can simply click “Enter” or “Return” a few times and create that space; not in Textile. You’ll need to stack up that bit of code, like this:

11. Add links to your blog.
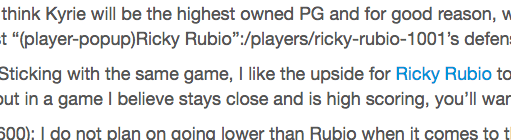
You may want to link to a previous blog, link to your Twitter profile, or link to an outside source within your blog. In Textile, simply typing the URL won’t create a link.
To include a link, enclose the words you want linked in quotation marks, followed by a colon (no spaces), followed by the URL you are linking to (again, no spaces). So, for example, the above paragraph would look like this:

12. Using possessives with player names.
You may have come across a player’s name in a blog that looks like this:
Or maybe, if you’ve got a really keen eye for grammar, you’ve noticed that an apostrophe is missing from a player’s name in a blog, like this:
Textile is a little finicky when it comes to adding possessives to player names, but there’s an easy fix. If you’re scanning through your blog and notice one of the two above errors in your blog, go back to the editing screen and place the apostrophe and the “s” within the player’s name in the code. Here’s an example, where in the top image should be changed to the bottom image in order to make the player’s name possessive:
Incorrect:

Correct:

13. Spead the word!
Twitter seems to be the social media method of choice for the DFS industry, and it only takes a few seconds to tweet out the link to your blog once it’s posted. One of the best parts of the RG blog program is the way the bloggers support each other, so follow other RG bloggers on Twitter, read and leave comments in their blogs, and watch your readership grow.